Wednesday, April 27, 2016

Providing different forms for different users in SharePoint Online

If you want to create different forms to different types of users in Forms Designer for SharePoint Online, you have two options: use permission settings or use SharePoint groups. We’ll look at both options in this article.

Suppose we have two types of users on our SharePoint website: managers and regular users. Managers have elevated privileges and we want to give them a particular set of functionality in a form. And regular users should receive a smaller or a different set of functionality and we want to give them a default form.

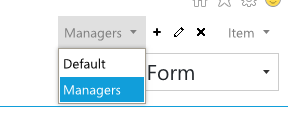
What we will do first is create an additional form set for managers using the plus button in the top right corner of Forms Designer.

Adding multiple form sets for a SharePoint list

Using permission settings

SharePoint has inbuilt permissions that we will utilize to distinguish managers from non-managers. Please check this list to see the available permissions:
https://msdn.microsoft.com/EN-US/library/ms412690.

We will pick CreateGroups to differentiate managers from non-managers, as only managers are allowed to create groups on our website.

We then will add an html control onto the default form in Forms Designer and paste the following html code inside it:

<Sharepoint:SPSecurityTrimmedControl runat="server" PermissionsString="CreateGroups" EmitDiv="true">
<script type="text/javascript">
    fd.openForm('fd_Item_52b1ac46-b55e-4d3c-9807-dec2a57b2e9f_EditForm.aspx');
</script>
</Sharepoint:SPSecurityTrimmedControl>
Using SPSecurityTrimmedControl in a SharePoint form

We have used CreateGroups permission string and the name of the form where we want our managers to be redirected to. The name of the form can be seen if you go to the appropriate form set in Forms Designer (in our case it’s Manager) and pick the appropriate form (in our case it’s Edit Form). That is the form that managers will be redirected onto:

SharePoint form filename

Now whenever a manager opens the default edit form he or she will be redirected to his manager-only form, while a non-manager will stay on the default form.

Using SharePoint groups

Another choice we have to set up user group specific forms is by utilizing SharePoint groups.

For this we’ll need to add a JavaScript script to document library. Create a file named redirect.htm and add the following code to it:

<script type="text/javascript">
ExecuteOrDelayUntilScriptLoaded(function () {
 fd.openForm('fd_Item_ee433778-833d-4154-a72f-f68dc876fdc5_EditForm.aspx');
}, 'plumsail.fd.core.js');
</script>

Again, you’ll need to replace the filename as before.

Upload redirect.htm to a document library on your website. Take note of its URL.

Now to go the list with your form sets. Click to edit one of the three forms, we’ll be editing the Edit Form.

Editing SharePoint form page

You’ll be redirected to the default edit form in edit mode, click “Add a Web Part” and add a Content Editor webpart:

Adding Content Editor Web Part to a SharePoint form

Click the Content Editor Webpart’s little arrow button and click Edit.

Enter the URL of redirect.htm into the box:

Setting Content Link property of the Content Editor Web Part

Expand Advanced and enter the SharePoint group members of which you want to be redirected to the additional edit form, in our case it’d be the site collection owners that will be redirected to the Manager edit form:

Settings Target Audiences property of the Content Editor Web Part

Click OK.

Now all members of the group will be redirected to the Manager edit form, while non-members will stay on the default form.

Tuesday, April 26, 2016

Using a Cross-site Lookup to a SharePoint list with an exceeded threshold limit

In SharePoint there is a default limit of 5000 items that you can add to a list until you are unable to filter that list. For more information on this see here.

What this means in practice is that you are unable to use a SharePoint Cross-site Lookup field that points to a list with an exceeded threshold. In this article we will describe a way of how you can go around the problem.

Note that in SharePoint On-Premises you can increase the threshold limit, for that you can check this article (it’s for SharePoint 2010, but 2013 is the same).

If you cannot or don’t want to change the limit, follow this procedure:

  1. Index the columns that your use to filter the list items by. Here you should include any fields you’re using in the filter=… part of the query (go to Manage Plumsail Lookups → Request items to see code that returns the two queries)
  2. Remove the orderby parameter from the first query (note the lack of the orderby parameter in the following example)
function (term, page) {
    if (!term || term.length == 0) {
        return "{WebUrl}/_api/web/lists('{ListId}')/items?$select=Id,{LookupField}&$top=10";
    }
    return "{WebUrl}/_api/web/lists('{ListId}')/items?$select=Id,{LookupField}&$orderby={LookupField}&$filter=startswith({LookupField}, '" + encodeURIComponent(term) + "')&$top=10";
}

Tuesday, April 5, 2016

Using ink sketch control in a SharePoint form to place markings on an image from Tablets, iPad, or PC

You can use the sketch control of SharePoint Forms Designer to put markings on an image (note, it won’t add markings to the actual image file but rather it will visually place your markings on top of it).

For example, you may wish to allow your users to draw the directions to somewhere on a map:

Draw on an image in a SharePoint form

Or an insurance company may wish to specify damaged parts of a vehicle on its photographs:

Draw on a picture in a SharePoint form

To set this up you need to be familiar with the ink sketch control, if you are not please read the article.

Once you have you ink sketch control set up, you will need to:

  1. Add a text field to the list, call it PictureURL, place it on the form. This field will contain a URL to the background picture for the ink sketch. Note, you can upload the picture to a document library on you SharePoint site and then just paste the link into this field.
  2. Add the following JavaScript to the form:
    var url = fd.field('PictureURL').value();
    $('.sketch').css('background-image', 'url("' + url + '")');
    
  3. Add CSS Class ‘sketch’ to the ink sketch control.
  4. Set the ink sketch’s height and width attributes to those of the image and save.

Ink Sketch control of SharePoint Forms Designer

Now the user will need to enter some URL that points to an image file into the PictureURL field, save, reload the form and he will get the ink sketch with the image as the background.