Thursday, April 11, 2013

SharePoint 2013 form with related items list (part 2)

Note: This entry is outdated. The current version of Forms Designer contains 'Related Items' control which can be distributed anywhere in the form and quickly configured via its properties. Please, see our article about this new functionality. And of course, if you already have a license you can upgrade it to the latest version for free.

I have started a series of posts about creating forms with related items. In the previous post I described how to do that in a display form. Now I will demonstrate how to place related items into an edit form and edit them directly in it.

Like in the case of a display form, we have to place additional web part with the list of related items into an edit form . Navigate to the parent list, select List tab in the ribbon and select (Item) Edit Form in the drop down menu of the Form Web Part:

SharePoint Form Web Parts

Click 'Add a Web Part' link at the top of a page and select related items list in the web parts dialog. You can see the following text at the top of the inserted list:

SharePoint 2013 Quick Edit

We have to disable in-place editing because if the user adds a new item in this mode they have manually fill order number. Here is the illustration:

SharePoint 2013 Quick Edit

So, we will remove in-place editing from this list and I will show how to fill order number automatically in the new form of a related item. Generally, I recommend you to minimize the number of ways of editing related items, because you can get stuck with many issues related to the ribbon, automatic redirection from the parent form and etc.

Now, let's remove in-place editing link. Save the form, go to the list of related items, open its settings page. Click Advanced Settings and disable Quick edit:

SharePoint 2013 Quick Edit

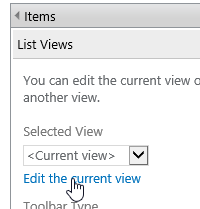
Return to the parent list and open its editing form in edit mode as we did above. As you can see there is only one link at the top of the related items: 'new item'. Great, now open properties of this web part and click 'Edit the current view' link. Like in the case of the display form, lets remove 'Product Name (linked to item with edit menu)' column from the view and replace it with 'Product Name (linked to item)'. Next, uncheck 'Allow individual item checkboxes' in the Tabular View section.

This way we disable the context menu and ribbon and leave an only way for editing items: user has to open them in a dialog window and remove or edit them from its ribbon.

Also remove 'OrderNum' column from the view, because there will be items related to the current order only. Like in the case of display form I have added total price into my view.

Save view and the edit form and go to Forms Designer. Select Edit Form, open JavaScript editor and past the same script like in the case of Display form:

var wp0 = $('div[id^="MSOZoneCell_WebPartWPQ"]:eq(0)');
wp0.detach().appendTo('#fd_tabcontrol-0-tab-4');
wp0.attr("onmouseup", "").attr("onkeyup", "");

I will not comment on it, you can find the description in the first post. Apart from this, we have to add the current order number into the 'new item' link of the list of related items to prefill it automatically in the new form of an item. Add the following JavaScript into editor:

var newItem = wp0.find('.ms-list-addnew a');
// getting query string hash
var queryString = SP.ScriptHelpers.getDocumentQueryPairs();
// adding get-parameter 'order' into new item link
newItem.attr('onclick', 'NewItem2(event, "' + newItem.attr('href') + '&order=' + queryString['ID'] + '"); return false;')

Save the form and close Forms Designer. Now open SharePoint Designer and add filtration to the related items by the current order as described for the Display form.

Finally, we have to modify a new item form to automatically fill 'OrderNum' column based on the provided get-parameter. Open the new form in the Form Designer, distribute fields in the form and open JavaScript editor. Paste the following code there:

// getting query string hash
var queryString = SP.ScriptHelpers.getDocumentQueryPairs();
// fill order number
fd.field('OrderNum').control().value(queryString['order']);

Now, when I click a 'new item' link from the Edit form of the order, the 'OrderNum' field is prefilled automatically with the current order number:

SharePoint edit form with list of related items

Tuesday, April 9, 2013

SharePoint 2013 form with related items list (part 1)

Note: This entry is outdated. The current version of Forms Designer contains 'Related Items' control which can be distributed anywhere in the form and quickly configured via its properties. Please, see our article about this new functionality. And of course, if you already have a license you can upgrade it to the latest version for free.

One of the usual cases of our customers is to create a form with related items, e. g. an order form with the list of items of the order. I will demonstrate how to place related items in the separate tab of the parent form and add or edit them directly in the current tab. I divided this manual into 3 parts:

  1. Display form
  2. Edit form
  3. New form

In this entry I will show how to create a display form with tabs and place related items into the separate tab. I created the list of orders and the list of order items with the following columns: Product Name (renamed Title), Weight, Width, Height, Depth, Quantity and Total price. I added lookup field OrderNum into the list of order items to link items with the order.

First, I designed forms of an order with Forms Designer, added tabs 'Customer', 'Billing Info', 'Shipping Info' and 'Items'. I will put related items in the 'Items' tab, which is now empty. Here is my form:

SharePoint form with tabs

Next, I changed the order items list setting to open forms in a dialog window. So users will be able to edit order items directly from the order form without leaving it. The described option is located here: List Settings -> Advanced settings -> Launch forms in a dialog

Now, go to the orders list and select List tab in the ribbon. Choose Form Web Parts drop down and select (Item) Display Form:

SharePoint form web parts

Click 'Add a Web Part' and select Order Items list. In the web part menu select 'Edit Web Part' item.

SharePoint edit web part

We will not allow users to edit the list of items in the display form of an order. So, first of all we have to disable links 'new item' and 'edit' on the top of the list. Change Toolbar Type to 'No Toolbar' in the settings window.

Next, click 'Edit the current view' link:

SharePoint edit current view

Here remove 'Product Name (linked to item with edit menu)' column from the view and replace it with Product Name (linked to item). Now users will not see an order item's context menu.

In the 'Totals' section I added the sum of Total Price to display it for the selected order. Ok, save the view. Next, we have to move the list of order items into the 'Items' tab and filter them by the current order.

Open Forms Designer editor for Orders list and select Display Form. Open JavaScript editor. The following JavaScript takes the first web part and replaces it into the fourth tab:

var wp0 = $('div[id^="MSOZoneCell_WebPartWPQ"]:eq(0)');
wp0.detach().appendTo('#fd_tabcontrol-0-tab-4');

When user clicks anywhere on the table of items, new tabs appear in the ribbon: Items and List. We have to disable this functionality to forbid users to edit the list of order items from a display form of an order. Paste the following row into JavaScript editor to disable mouse and keyboard events:

wp0.attr("onmouseup", "").attr("onkeyup", "");

Ok, save the display form, close Forms Designer and open any order in the display mode. Now you can see that the order items list appears in the 'Items' tab. The last thing we have to do is to filter this list by the current order. Open our display form in SharePoint Designer. Files generated with Forms Designer start with fd_{Content Type Name}_{Form Type}. So, my display form is called fd_Item_Display.aspx.

Find XsltListViewWebPart that renders Order Items list. Add a new binding parameter into ParameterBindings section:

<ParameterBinding Name="OrderId" Location="QueryString(ID)" DefaultValue="0"/>

Here we bound OrderId to get-parameter ID that contains the current order id value. You can find more info about parameter bindings here:
http://blogs.msdn.com/b/joshuag/archive/2009/04/06/dataformwebpart-parameters-and-parameterbindings.aspx

Now we can use 'OrderId' parameter in CAML-query:

<Where>
  <Eq>
    <FieldRef Name="OrderNum" LookupId="TRUE"/>
    <Value Type="Lookup">{OrderId}</Value>
  </Eq>
</Where>

'OrderNum' is an internal name of my lookup field. Place the code above into Query section and save the page.

Now on the display form of an order we can see order items related to the current order only. Here is my final display form:

SharePoint form with the list of related items

When users click on product name they see display form of an item in a dialog window:

SharePoint related item form

Friday, April 5, 2013

Redirect after SharePoint form submission

In this article I will demonstrate how to handle a form submission event with Forms Designer tool and particularly how to redirect the user to the specific page.

Many of our clients request an option to redirect the user to the 'Thank you' page after creating a new item. Just paste the following script into the Forms Designer JavaScript editor and your users will be redirected to '/SitePages/ThankYou.aspx' page on the submission and to '/SitePages/Cancel.aspx' on the cancellation:

fd.cancel().click(function(){ STSNavigate('/SitePages/Cancel.aspx');return false; });
fd.onsubmit(function (){
    $("#aspnetForm").attr('action',location.pathname+'?Source=/SitePages/ThankYou.aspx');
    return true;
});

Ok, another popular request is to allow users to add multiple items without closing a new form. We suggest to confirm with the user whether they want to add a new item after the submission of the current one. If they want so, the new form will be refreshed. Otherwise the user will be redirected to the 'Thank you' page. I have extended the previous script with the described functionality:

fd.cancel().click(function(){ STSNavigate('/SitePages/Cancel.aspx');return false; });
fd.onsubmit(function (){
  if (confirm('Would you like to add a next item?')) {
    $("#aspnetForm").attr('action',location.pathname+'?Source=' + location.pathname);
  } else {
    $("#aspnetForm").attr('action',location.pathname+'?Source=/SitePages/ThankYou.aspx');
  }
  return true;
});

As you can see it is very easy to extend functionality of your form with Forms Designer JavaScript framework. You can find the full description of fd-object on the official website.

Thursday, April 4, 2013

Getting and setting SharePoint form field values

Forms Designer provides JavaScript-framework that allows to manipulate fields in a simple JQuery manner. You can find how to set or get current field values in the official website.

But what if the field is more complex than a simple input, what if it has multiple parts of values, like lookup or date and time? How do you get lookup id and lookup text? Below I placed the table that illustrates how you get or set different value types for the most SharePoint types of fields. To create this table I used the current last version of Forms Designer: 2.7.9.

Field Type Get / Set Script
Single Line of Text Get
fd.field('Title').value();
Set
fd.field('Title').value('Default title');
OnChange
fd.field('Title').change(function(){});
Multiline Plain Text Field Get
fd.field('MultipleLinePlain').value();
Set
fd.field('MultipleLinePlain')
  .value('MultipleLinePlain');
OnChange
fd.field('MultilinePlain').change(
  function(){alert('Field has been changed!')}
);
Multiline RTF Field Get
fd.field('MultilineRichText').value();
Set
fd.field('MultilineRichText')
  .value('MultilineRichText');
OnChange
fd.field('MultilineRichText').change(
  function(){alert('Field has been changed!')}
);
Multiline Enhanced Rich Text Field Get
fd.field('MultilineEnhanced').value();
Set
fd.field('MultilineEnhanced')
  .value('MultilineEnhanced');
OnChange
fd.field('MultilineEnhanced').change(
  function(){alert('Field has been changed!')}
);
Choice Single Get
fd.field('ChoiceSingle').value();
Set
fd.field('ChoiceSingle').value('B');
OnChange
fd.field('Choice').change(function(){
  alert('Field changed!');
});
Choice Multiple Get
var checkboxIndex = 2;
fd.field('MultiChoice').control()._el()
  .find('input[type="checkbox"]').eq(checkboxIndex)
  .is(':checked');
Set
var checkboxIndex = 2;
fd.field('MultiChoice').control()._el()
  .find('input[type="checkbox"]').eq(checkboxIndex)
  .prop('checked', true);
OnChange
fd.field('MultiChoice').change(function(){
  alert('Field changed!');
});
Number Get
fd.field('Number').value();
Set
fd.field('Number').value('13');
OnChange
fd.field('Number').change(function(){
  alert('Field changed!');
});
Currency Get
fd.field('Currency').value();
Set
fd.field('Currency').value('23');
OnChange
fd.field('Currency').change(function(){
  alert('Field changed!');
});
Date Get
fd.field('Date').value();
Get Date-object
field('Date').control('getDate') // returns Date-object
Set
fd.field('Date').value('4/21/2012'); // by String

fd.field('DateTime')
  .value(new Date()); // by Date-object
OnChange
fd.field('Date').change(function(){
  alert('Field changed!');
});
DateTime Get
fd.field('DateTime').value()[0]; // date
fd.field('DateTime').value()[1]; // hours
fd.field('DateTime').value()[2]; // minutes
Get Date-object
field('DateTime').control('getDate') // returns Date-object
Set
fd.field('DateTime')
  .value(['4/21/2012', '11 PM', '35']); // by Array
fd.field('DateTime')
  .value(new Date()); // by Date-object
OnChange
fd.field('DateTime').change(function(){
  alert('Field changed!');
});
Hyperlink / Image Get
fd.field('Hyperlink').value()[0]; // link
fd.field('Hyperlink').value()[1]; // descr
Set
fd.field('Hyperlink')
  .value(['http://someurl', 'description']);
OnChange
fd.field('Hyperlink').change(function() {
  alert('Changed!');
});
Single Lookup Value
Get Text
fd.field('Lookup').control('getSelectedText');
Get ID
fd.field('Lookup').value();
Set Text
fd.field('Lookup').value('Text');
Set ID
var ID = 4;
fd.field('Lookup').value(ID);
OnChange
fd.field('Lookup')
  .change(function(){});
Multi Lookup Values Get All
var selectedItems = fd.field('LookupMultiple')
  .control()._el().find("select:eq(1) option");
var s = '';
for (var i = 0; i < selectedItems.length; i++) {
  s += selectedItems.eq(i).text() + ';';
}
alert(s);
Get First
fd.field('MultiLookup').control()._el()
  .find("select:eq(1) option").eq(0).text()
Get Second
fd.field('MultiLookup').control()._el()
  .find("select:eq(1) option").eq(1).text()
Get ID
// first selected:
fd.field('MultiLookup').control()._el()
  .find('select:eq(1) option').eq(0).val(); 

// second selected:
fd.field('MultiLookup').control()._el()
  .find('select:eq(1) option').eq(1).val(); 
Set
var ID = 3;
// select element by ID:
fd.field('MultiLookup').control()._el()
  .find('select:eq(0)').val(ID); 

// add button click:
fd.field('MultiLookup').control()._el()
  .find('button:eq(0)').click(); 
OnChange
fd.field('MultiLookup').change(function(){
  alert('Field changed!');
});
Boolean Get
fd.field('Boolean').value();
Set
fd.field('Boolean').value('1');
OnChange
fd.field('Boolean').change(function(){
  alert('Field changed!');
});
Client People Picker Get All Logins
fd.field('User').control('ready', function() {
  var selectedUsers = fd.field('User').value();
  for (var i = 0; i < selectedUsers.length; i++) {
    alert('Login: ' + selectedUsers[i].Key);
  }
});
Set
// assign value by a display name
fd.field('User').value('Tim Watts');

// by a login
fd.field('User').value('DEV\\ann');

// or by an e-mail:
fd.field('User').value('AGibson@contoso.com');
  
OnChange
fd.field('User').change(function(){
  alert('Field changed!');
});
Server People Picker with multiple choice Get All Logins
var logins = '';
$.each(fd.field('People').value()
  .dictionaryEntries,
  function() {
    logins += this.AccountName + '; ';
  });
Set
fd.field('People').value('DOMAIN\\login');
OnChange
fd.field('People').change(function(){
  alert('Field changed!');
});
Server People Picker with single choice Get
fd.field('PersonGroupSingle')
  .value().dictionaryEntries[0].AccountName
Set
fd.field('Person').value('DOMAIN\\login');
OnChange
fd.field('Person').change(function(){
  alert('Field changed!');
});
External Data Get

Returns field value of External List item:

fd.field('ExternalData').value()
  .dictionaryEntries[0]['FieldOfExternalList']
'ExternalData' is an internal name of the lookup column.
'FieldNameOfExternalList' is an internal name of the external list column.

If you include additional columns to the target list in lookup settings you will be able to get them dynamically as well:

fd.field('ExternalData').value()
  .dictionaryEntries[0]['AdditionalFieldOfExternalList']
'AdditionalFieldOfExternalList' is an internal name of the external list column which has been added as additional field in lookup settings.

Set

fd.field('ExternalData')
  .value({key: '__bg40003300', text: 'Item 1'});
key is BDC Identity of the selected item.
text is a display name of the selected item.

OnChange
fd.field('ExternalData').change(function(){
  alert('Field changed!');
});
Plumsail Cross-site Lookup with single value Get ID
fd.field('CrossSiteLookup').value()
Get title
fd.field('CrossSiteLookup').control('data')['Title']
Set

Set ID:

fd.field('CrossSiteLookup').value(1);

Set ID and display text:

fd.field('CrossSiteLookup')
  .value({Id: 1, Title: 'Item 1'});

OnChange
fd.field('CrossSiteLookup').change(function(){
  alert('Field changed!');
});
Plumsail Cross-site Lookup with multiple values Get IDs Returns an array if selected ids:
fd.field('CrossSiteLookup').value()
Get titles

First item:

fd.field('CrossSiteLookup').control('data')[0]['Title']

Second item:

fd.field('CrossSiteLookup').control('data')[1]['Title']

Set
fd.field('CrossSiteLookup')
  .value([{Id: 1, Title: 'Item 1'}, 
    {Id: 2, Title: 'Item 2'}])

OnChange
fd.field('CrossSiteLookup').change(function(){
  alert('Field changed!');
});